3DPrint Mr Boneman

Mr Bone man is upside down because it eases his passage through the birth canal and into your dimensions.
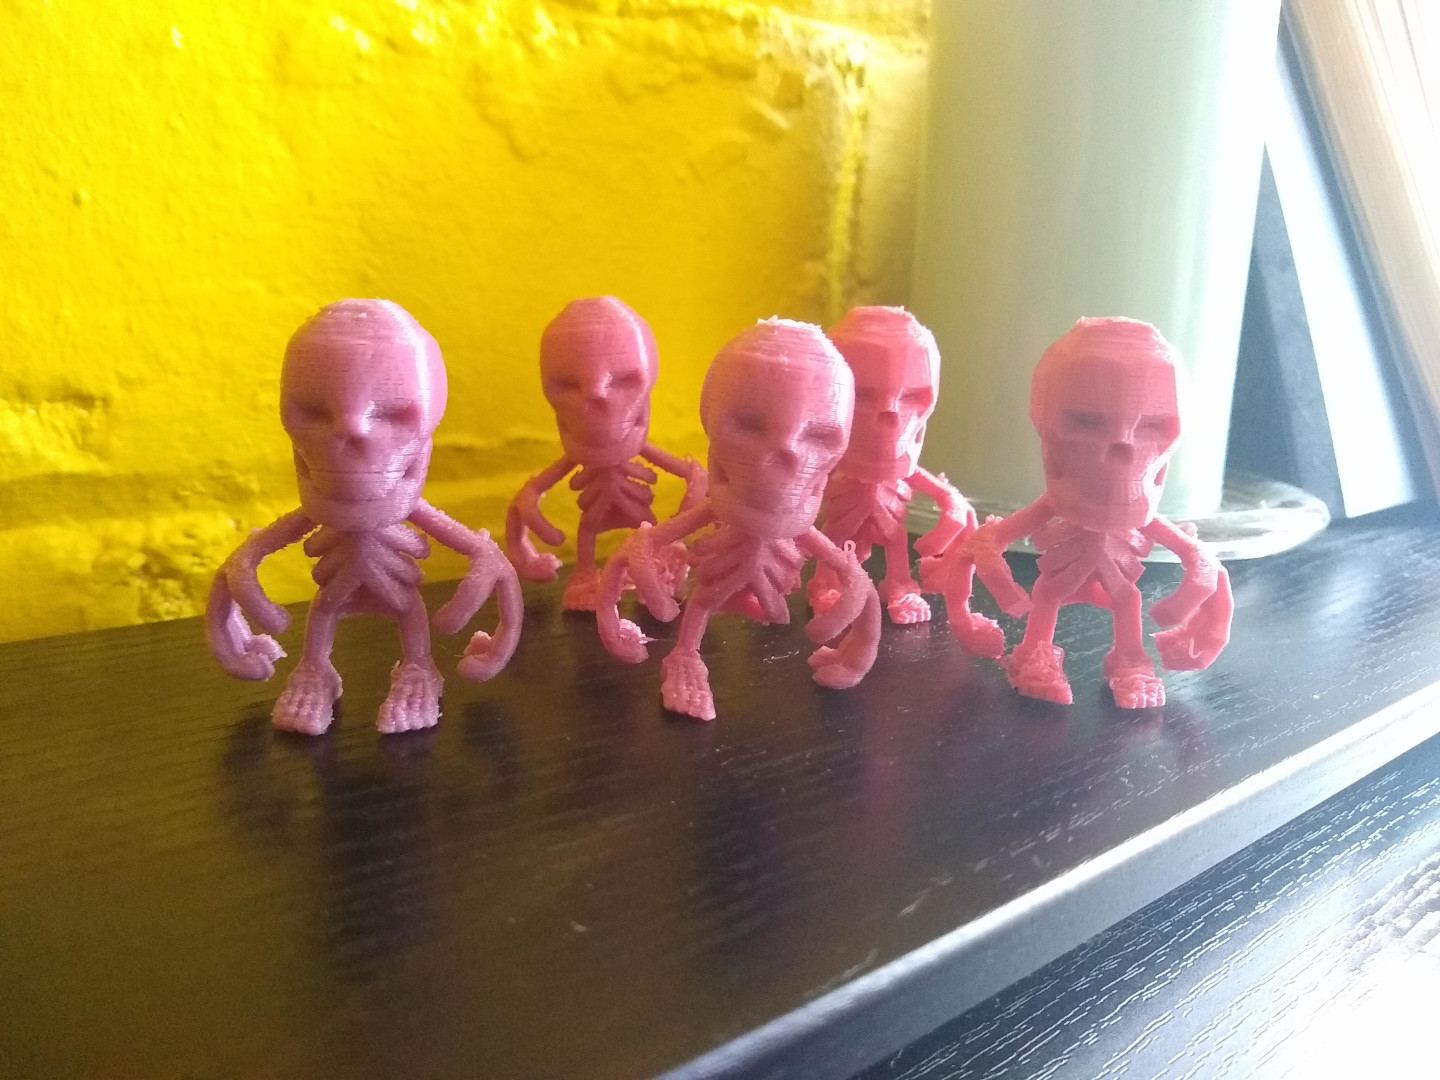
This is a test print from my Avatar generator, the mesh had to be messed around with a bit, adding something to hold the hands and feet to the torso then bones needed thickening up in places and angles reduced in order to get it to print without needing support. Which is also why the STL is upside down, that way it grows upwards like a branching tree and mostly works perfectly until it gets to the feet which is just OK. It was printed with 2mm of support so the very top of the head sticks to the build plate without being cut flat. The top of the head is still slightly wonky and you need to pull the support hat off without breaking the neck but at least it prints.
In the blender file you see some modifier tricks to get a mesh out that doesn't crash slic3r using remesh and decimate. Makes the STL file huge and blender slow but the output is easier to slice. You can also choose between lowpoly or smooth by removing the initial subdivide modifier, I kinda like the low poly look in 3d prints but other people seem to prefer it smooth :)
This is the Slic3r config files I used with an ender 3 pro. I've not really had much luck with support materials beyond using it to stick the first few layers to the bed so that is how it is setup. Should take an hour and half to print and if it goes wrong it will be right at the end when it gets to the feet.
In other news after ripping a hole in my magnetic bed cover I've finally worked out how to use the glass bed. The secret is Pritt Stick, slap a bit of that on each time and prints will actually stick to the bed rather than start sliding around halfway through a print. Tried other suggested tricks but that is the only one that worked for me. Not sure needing glue with each print is an upgrade from the magnetic bed cover which I found much easier to use but at least it works now.